
Is it time to say goodbye to LastPass?
In this day and age it’s unlikely you’d not be using some password manager tool available out there. If you’re not, chances are you’re making one of the cardinal sins of password security; i.e password reuse. I’ll not delve further into the merits of using a password manager, but one subject I wanted to touch on is about the security of using cloud based password managers out there.
With the recent security breach with LastPass where it actually took them months to reveal the true extent on how severe the breach was, for me personally it was the last straw of being reliant on the cloud provider to ensure security for my data. I was a loyal user of LastPass for years and ensured I followed all the best practices LastPass tells you on managing your passwords online.
However with their latest security breach hackers have infact got copies of your encrypted vault. While the vault data isn’t readable unless they know your master password, if the hacker manages to brute force their way in, your vault data will be visible. While LastPass do say that your master password is unlikely to be cracked if the password you have setup follows their minimum guidelines, that’s of little comfort knowing a hacker could gain access to my vault data should they manage to bruteforce in.
So here’s me with my beer on a Saturday night cursing myself for having to go through the arduous task of resetting passwords for over 200 websites setup over the years. And that’s when I said to myself enough is enough. I’m no longer going to be a victim and looked for self hosting solutions on my own private cloud. While no environment is 100% secure, at least the chances of some hacker showing interest to my self hosted password vault from the millions of online users would be next to none and you have more granular control on access controls.
The solution
My requirements for a password manager were simple.
- It should support self hosting
- Be light weight and not be heavy on resources
- Reliability
- Mobile app support
- Browser integration support
After testing out a few options, Vaultwarden came out being the ideal solution for me. Vaultwarden is an alternative implementation of the Bitwarden server in Rust, including the Web Vault.
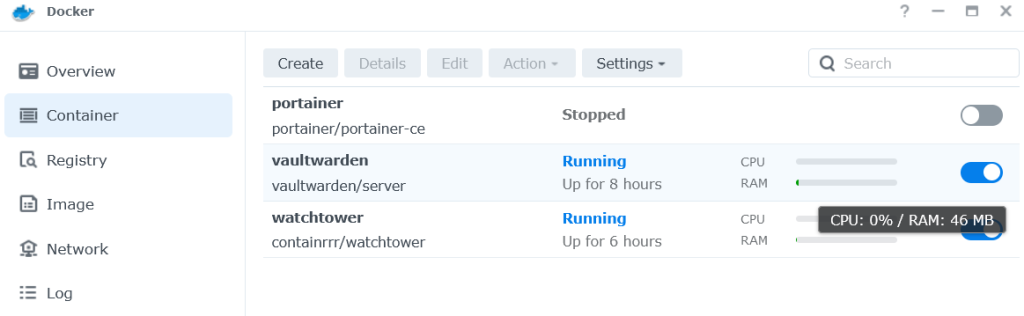
We proceeded to install Vaultwarden on our Synology DS220+ using docker containers. As you can see in the screenshot below, Vaultwarden is extremely lightweight, and was using around 46MB memory during normal usage.
While we won’t be going through the step by step process of installing Vaultwarden on the Synology NAS (There’s plenty of online guides for this already) we wanted to provide some additional inputs which would be helpful during the installation process.
Considerations when installing Vaultwarden
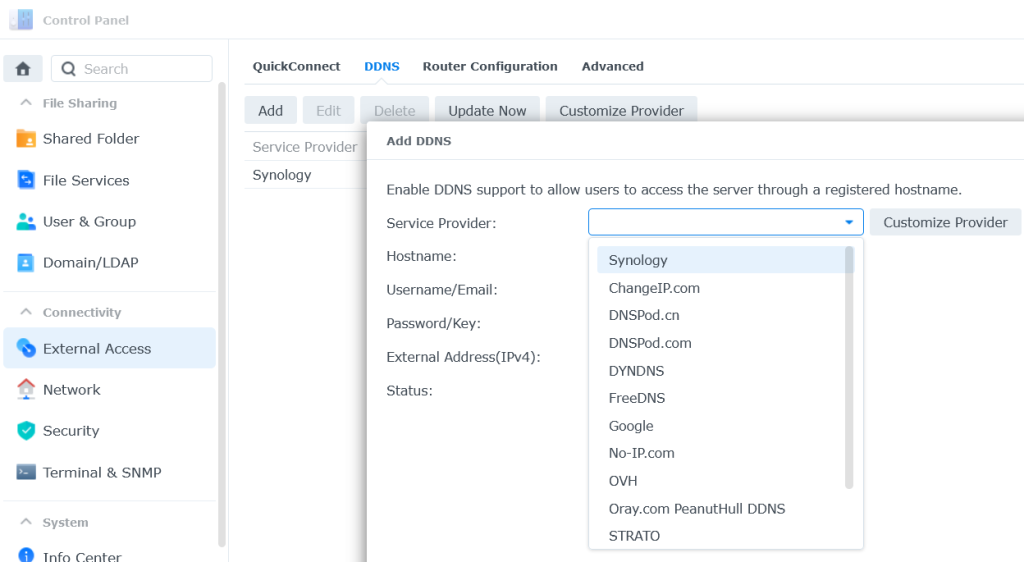
- Setting up the SSL Certificate
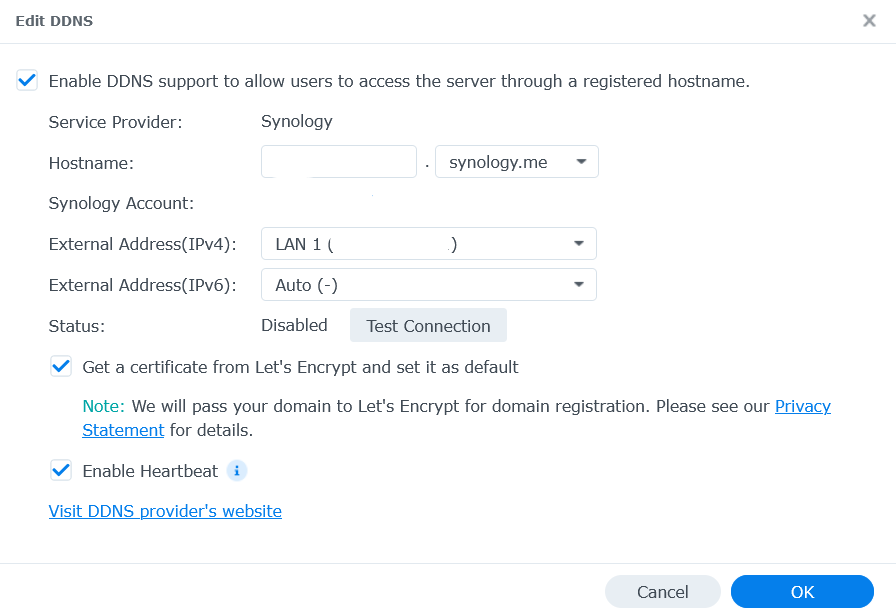
Unless you already have your own SSL Cert, can you get a free SSL cert via Synology. The cert will be “yourname.synology.me”. You also have the option of getting the cert as a wildcard certificate if you intend to use multiple services such as “servicename.yourname.synology.me”.
The key thing here is, unless you’re planning on accessing Vaultwarden externally, you can setup the external IP address to be your LAN IP of the Synology host. This will extend the expiry of the new cert to 3 months from the issue date as opposed to 1 month if it uses the public IP.
Giving the LAN IP is equally important if your accessing the service locally only as you’ll receive a SSL error when accessing the hostname via the browser if you provide the WAN IP address.
2. Reverse Proxy and Port forwarding
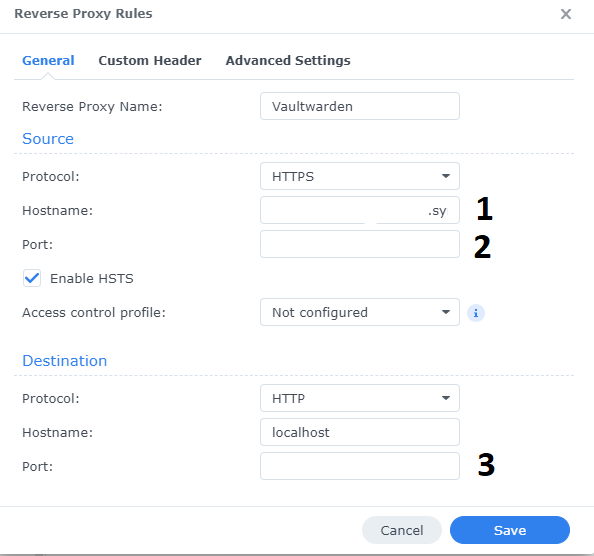
You’ll need to setup a reverse proxy as part of the installation process. For host name (point #1) you need to add the SSL name created previously.
You can use any port for point #2 apart from 443 if this port is being used for any other service. Ideally for home users, you can go with something non standard and as an example here, lets say we used 8442, then the URL to access your self hosted VaultWarden interface would be https://SSL-Name:8442 (Where the SSL-Name will be the name you created on step 1)
For the local port (point #3) this will depend on the port given when installing the VaultWarden software.
Make sure to port forward the port set on point #2 above on your router so that your routers knows how to direct traffic on that port. The IP address to route traffic should be the IP address of your Synology NAS.
3. DNS Record
If you’re hosting a private DNS in your LAN environment, you’ll also need to setup a DNS record so your router knows which IP to route traffic when you type in that URL.
The DNS record should look something like “vaultwarden.yourname.synology.me” pointing to “IP-Address-of-NAS“. If you don’t have a private DNS, you can set one up pretty easily on a Synology Router such as the Synology WRX560 or setup a Pi-Hole docker instance on your Synology NAS.
Alternatively you can edit your local host file on every PC to include the domain name to IP address combination. Below is an example of the DNS entry on Pi-Hole we setup on our LAN.

4. Keep your docker containers upto date
While you can spanw a new docker image with the latest repo manually, ideally you want to automate this process. Watchtower https://github.com/containrrr/watchtower automates this process for you and it’s pretty much a setup and forget solution. You’ll need another docker instance running Watchtower, but it uses minimal resources and you can have it running in the background.
Do reach out to us if you run into any issues or have further questions. I have been running my VaultWarden instance for over 2 weeks now and couldn’t be happier. You can use the Bitwarden mobile apps with VaultWarden as well. For desktop browsers the Bitwarden broweser extensions work flawlessless.
While no solution is 100% secure, at least you’re not as exposed as when using a popular cloud solution which is commonly targetted by hackers.