Secure remote connectivity to your home network with Synology VPN Plus server
If you’re a user who constanly requires remote connectivity to your internal network, securing the communication from your remote connection to your internal network should be at the top of your priorities. For example, say you want to access files stored on your local NAS device remotely or connect to one of your PC’s at home, the simplest solution here would be to setup a VPN on your home network ensuring the most secure way to communicate between the two sides.
In today’s guide, we are going to show you how to do this quickly and easily via the Synology VPN Plus server solution provided on their Synology WRX560 11ax wireless router.
Step 1 – Install the software
- Login to your Synolgy router and go to package center.
- Then select “VPN Plus Server” and click install. (You’ll see the “Open” button after the software is installed).

The Synology VPN Plus server is quite a robust and provides a comprehensive list of services to choose from. It supports multiple VPN services such as WebVPN, SSL VPN, Remote Desktop, OpenVPN, LT2P/IPSEC, PPTP and Site-to-Site VPN.
Step 2 -VPN Configuration
As stated at the top, we will be looking at setting up the “Synology VPN” solution on this guide as we found the configuration to be very straight forward and there’s no mucking about having to transfer across configuration files to your client devices.
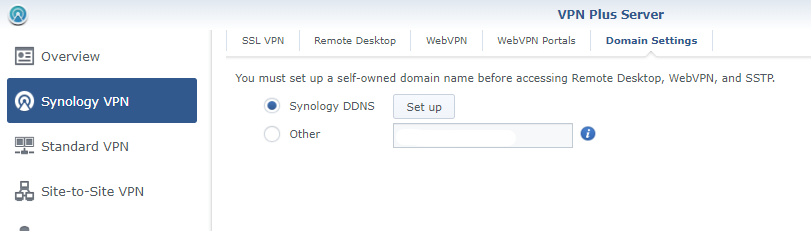
- Setup DDNS
First sep on the “Synology VPN” tab, is we need to setup DDNS located under “Domain Settings”.
Unless you already have a DDNS account, simply follow the instructions offered when you click “Set up” next to Synology DDNS. We already had a service setup at https://www.noip.com hence we proceeded to use that, however this step is pretty straight forward.
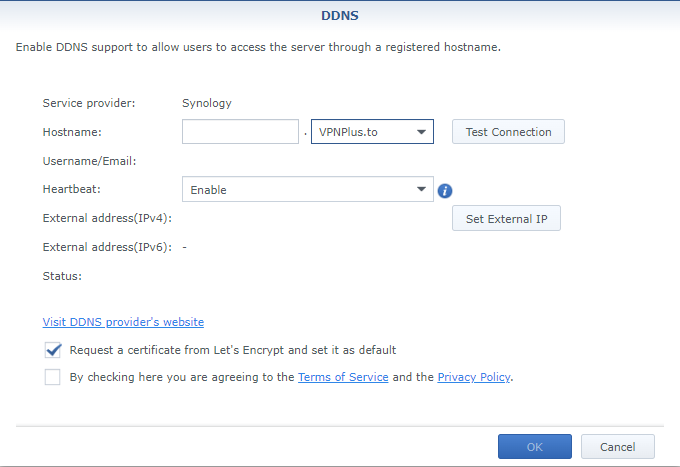
Clicking the “Setup” button will bring up this new window. Simpl type in a hostname for the DDNS domain name you want to be using. You can pretty much use any name here Eg: “MYWRX560VPN” and select any of the DDNS service providers Synology has given on the right hand side.
Make sure to check the tick box that says “Request a certificate from Lets Encrypt and set it as default”.
With all going as expected, you’ll see your new DDNS connection if you go to “Network Center” -> “Internet” and click on “Quickconnect & DDNS”.
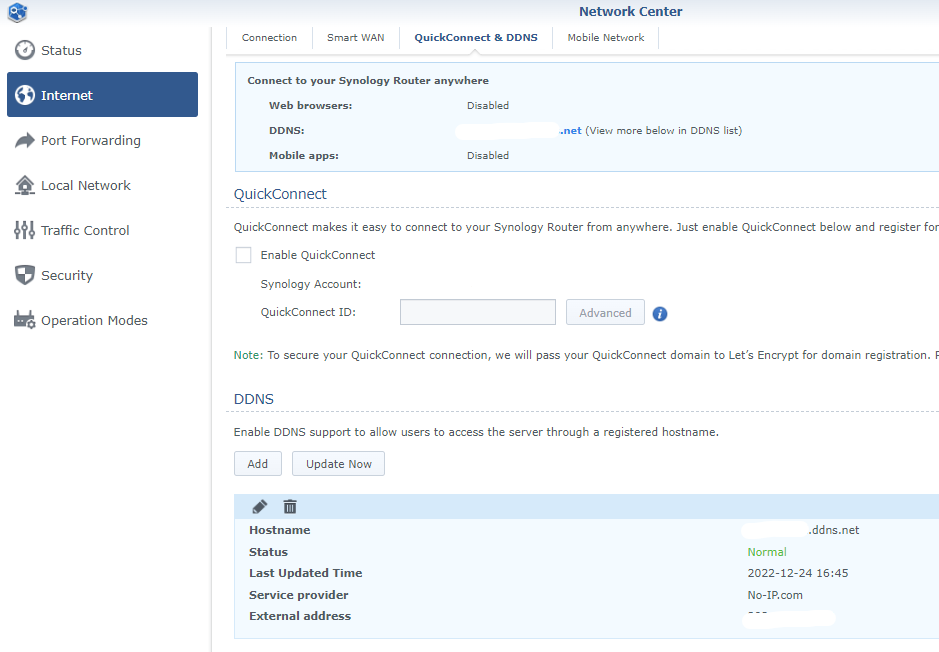
If the DDNS connection is up and running you’d see the “status” as Normal and it would show your current IP address provided by your service provider.
Now, go back to VPN Plus server and select “Enable Synology SSL VPN”
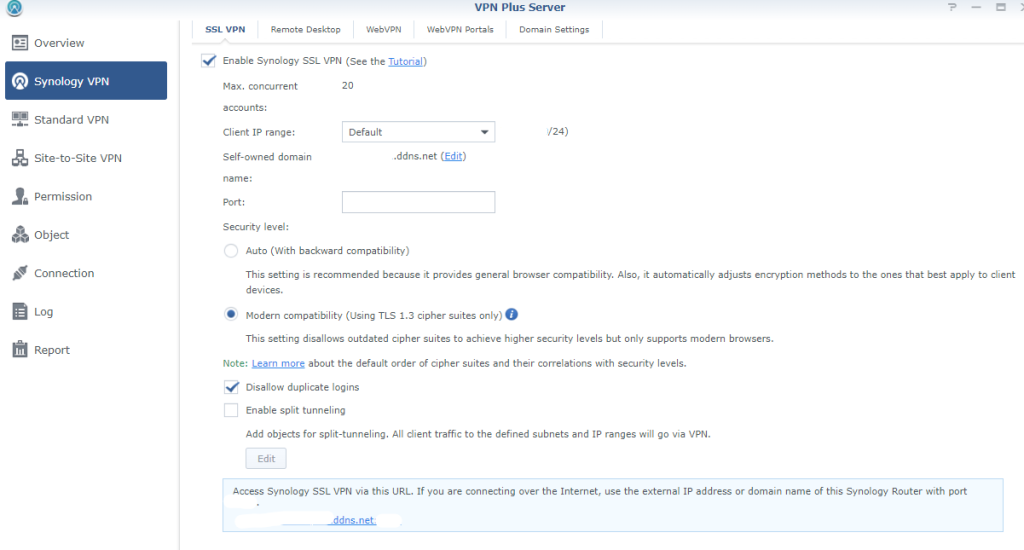
You’ll notice the “Self-owned domain name” field is now populated with the DDNS domain you setup previously.
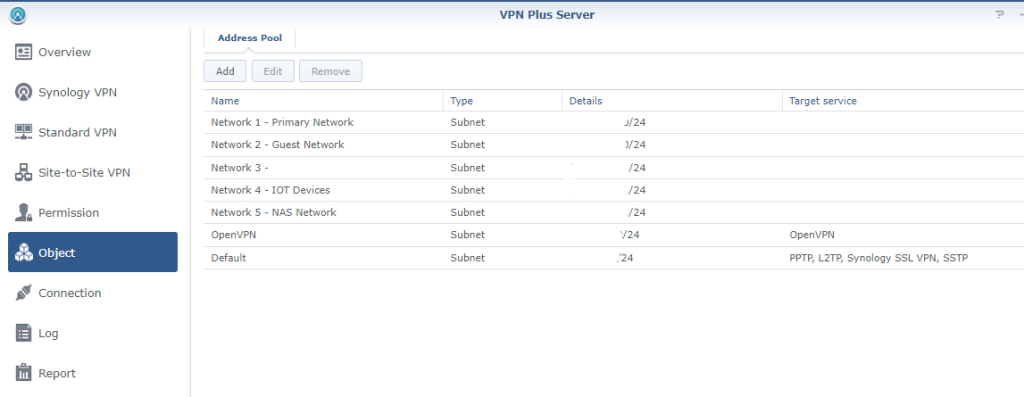
For the Client IP range, you can go with the default. If you want to change the default range, simply click on the “Object” tab, select the default row and hit edit.
For the port, you can give one that’s not commonly used. There are 0 – 65536 port ranges to choose from, so you can go with something like 11500 or a unique port that’s unlikely to be scanned regularly by bad bots.
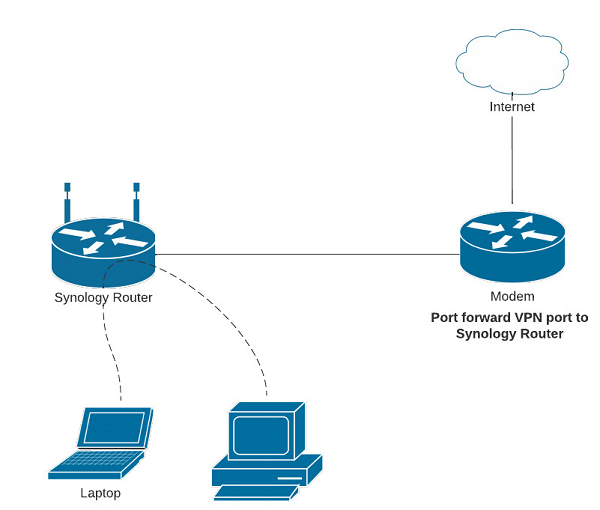
If you have a modem that sits in front of the router, make sure to port forward the port you setup for the VPN on the modem as well. If not, traffic coming from the internet will not know where to route to and your VPN will not work.
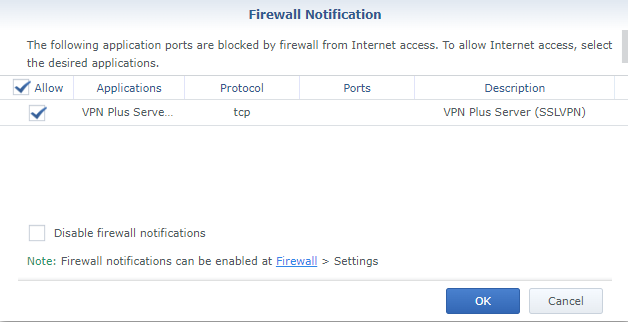
Step 3 – Firewall rules
You will get a notification as below to add the mentioned firewall rule so that the VPN client can connect to the SRM VPN service on the configured port. If you haven’t created one already, press “OK” as this is needed to allow VPN traffic through.
You will need to add further firewall rules to define which networks/services the VPN clients can use. For example the 2nd rule shown in the example below allows the VPN clients to connect to the NAS network. On the 1st rule we have also geo fensed the incoming IPs to only be from Australia, but you can configure this to be specific to your requirement.

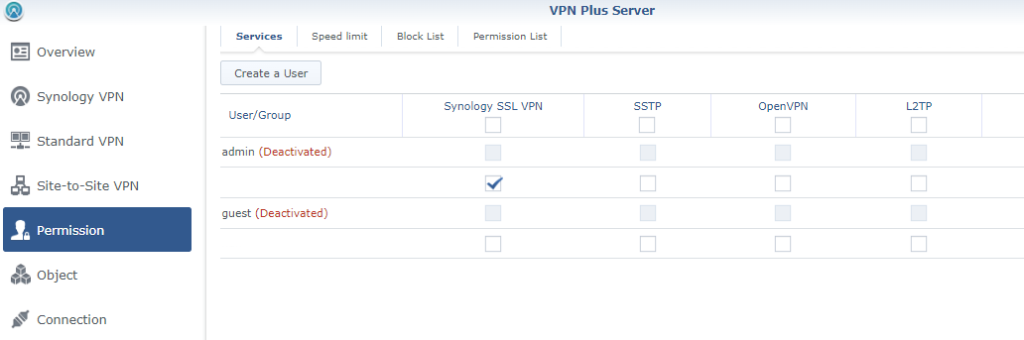
Step 4 – Setup VPN User/s
Next you need to setup the VPN users who’d be accessing the VPN service. Simply go into the “Permissions” tab on the VPN Plus server and click on “Create a user” and follow the prompts. If you’re only using Synology VPN, the users created will need only the “Synology SSL VPN” permiss
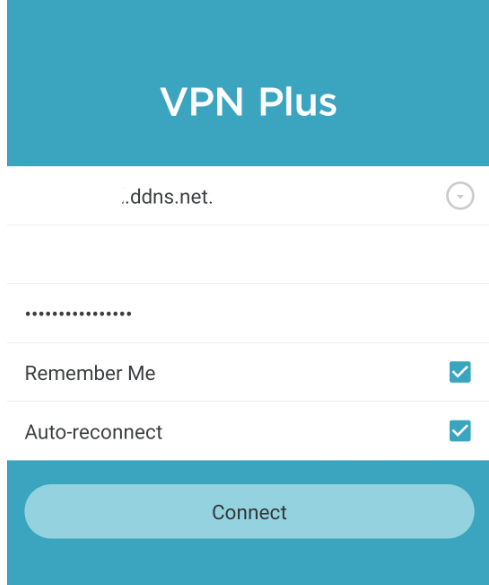
Step 5 – Setup the VPN Client
If you’re an Android or IOS user, simply head to the Google Play store to download the app or head down to the Synology Website https://www.synology.com/en-au/support/download/WRX560?version=1.3#utilities which also provides a desktop client.
Once the client is downloaded, simply enter the domain name along with the port configured for the VPN service. This is shown at the bottom on the “Synology VPN” tab. Enter the username and password for the relevant VPN user and hit connect.
There you have it, it’s as simple as that to configure the Synology VPN. Hit us with any further questions you may have to further fine tune your VPN service.