Synology Surveillance Station – low cost CCTV setup
Synology has already made a mark as being one of the robust Network Attached Storage (NAS) solutions in the market. One of the key drivers for Synology’s success is the wide array of applications they offer on their app store. This brings us to today’s topic where we look at the Synology Surveillance Station which is designed to deliver intelligent monitoring and video management tools to safeguard your valuable assets either at home or business. If you had no other justification to splash out for a NAS, this probably will change your mind.
Among the many benefits offered by Synology Surveillance Station, one aspect that stands out is that you’re no longer stuck with one specific brand; you now have the freedom to mix and match camera brands as you desire.
A point to remember is that Surveillance Station has come a long way to what it is today and gone through some major innovative updates since it was first released way back in 2008. At a glance here are some of the main functions offered by Surveillance Station.

Some key benefits of Synology Surveillance Station
- No monthly cloud fee – Unlike many cloud solutions where you’d need to sign up to a plan to store video recordings, with a NAS system this is a none issue. Furthermore you have complete freedom to decide on your data retention period where as you get limited options with cloud solutions such as Arlo or D-Link.
- Not dependent on your internet – With a NAS solution your cameras will continue to record regardless of your internet being down, which is a huge benefit over cloud solution. Moreover, you have greater assurance that your video data is being stored and not lost to the ether.
- Continuous Video Recording – This is not so much of a benefit comparing other NRV solutions, however when comparing with Cloud recording solutions where it uploads only short clips, this is no longer an issue.
- Less fault tolerant – We have used a fair few cloud recording solutions from D-Link, Ring and Arlo. What we have noticed is that when a camera detects a movement and starts recording, it captured around the first 30-45 seconds of the recording and misses to capture the rest. This is no longer an issue with a NVR.
- Data redundancy – Most proprietary NVR solutions do not have RAID capability on their NVRs. This is another huge advantage with a NAS based NVR as you can setup data redundancy out of the box.
- Platform agnostic – You’re not bound to any particular brand of cameras when opting for a NAS based NVR and can mix and match camera brands as needed.
- Complete control over your data – You have complete control over the data being recorded and stored unlike Cloud solutions.
- Significantly better motion detection functionality – When using certain cheaper brand cameras we found that their motion detection capability significantly improved when managed through the Synology Surveillance Station.
Synology offers more dedicated NVR solutions that cater to specific scenarios in retail educational and other enterprise grade requirements. You can check these out here.
Lets now see how we can setup a Synology Surveillance Station from scratch.
Setting up Synology Surveillance Station
The beauty of Synology Surveillance Station is the ease of installing the application and getting everything up and running.
Step 1
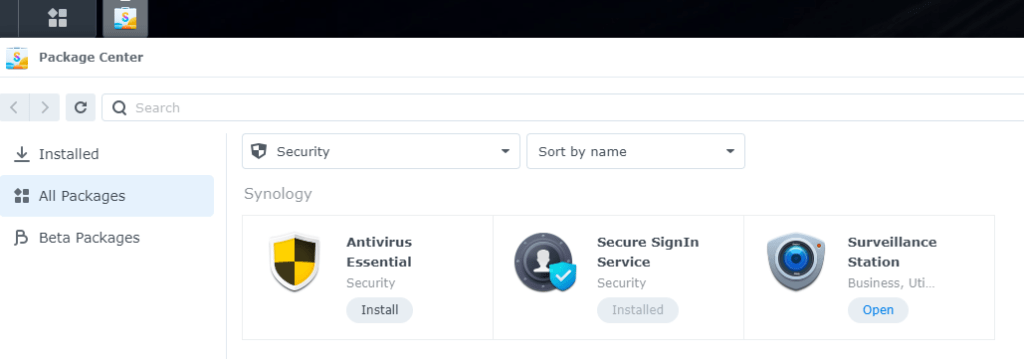
Install Surveillance Station from the Package Center. (Note: The screenshot below shows as “Open” since the application was already installed on our instance).
Step 2 – Install the cameras
Once the application is installed click on “Surveillance Station” icon from the Desktop window and you will be greeted with the following window. Our next step now is to install the cameras.

Synology Surveillance Station at the time of writing supports over 7600 IP cameras and video servers from over 130 brands. Follow this link to see if the cameras you have or plan to purchase are in the compatibility list. While this list may not be exhaustive as there have been reports where generic cameras with ONVIF support have been found to work with Surveillance Station.
Prior to adding the cameras to Surveillance Station, make sure they’re already visible on your local network. We were installing a few supported D-Link Wi-Fi cameras and we made sure they were connected to the Wi-Fi network.
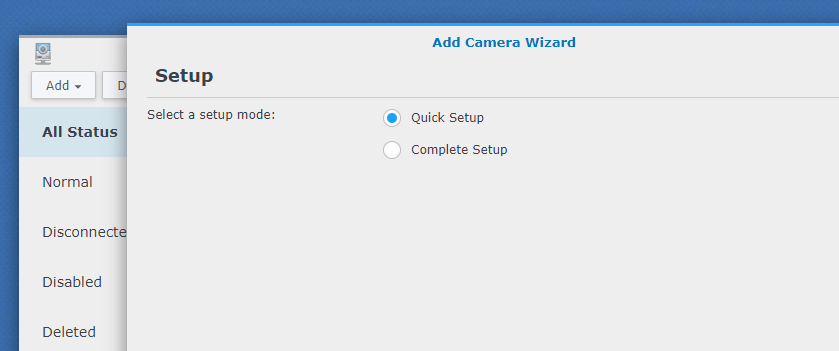
Next, open up the “IP Camera” application and click on “Add Camera”.

The Add Camera wizard gives you 2 options, ideally go with Quick setup and make further refinements once the cameras are fully installed.
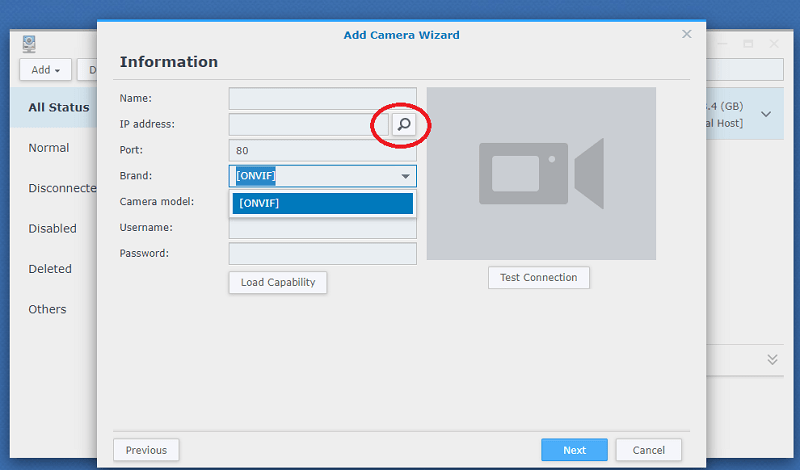
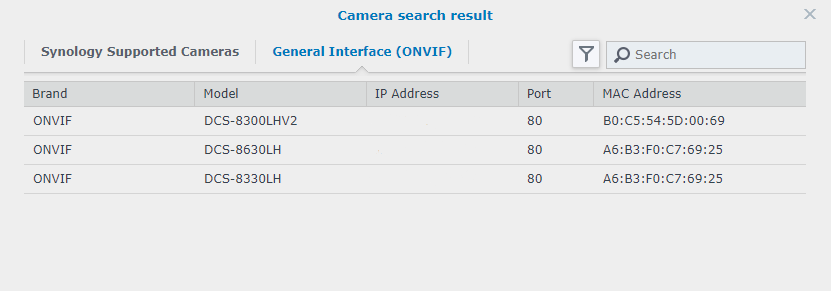
Next you get a search window which will scan your network and detect compatible cameras. Click on the search icon which will automatically initiate a scan and display compatible cameras detected.
Since the D-Link Wi-Fi cameras we were installing supported ONVIF protocol, they were showing up on the “General Interface (ONVIF)” tab. Next step is to select the camera you want to add.
On our D-Link cameras the username to be used was “admin” and the password was labeled on the power cord. This is unique to each camera hence we cannot post it here. Once the details are entered, click on “Test Connection” to see if you’d get a green tick confirming connectivity to the camera.

And that pretty much covers the initial steps of adding a camera to Surveillance Station. Repeat the above steps if you want to add more cameras.
Considerations when adding cameras
- Synology Surveillance Station offers only 2 camera licenses free. If you require more licenses, these will need to be purchased separately at approx. AU$79 per camera.
- Depending on the Synology NAS you have, there will be a maximum number of cameras you will be able to install.
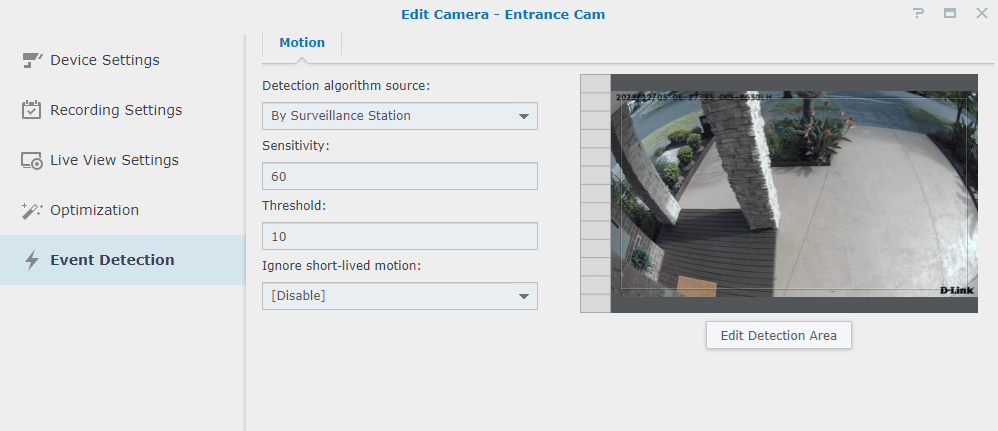
Step 3 – Advanced camera settings
Once the cameras are installed, you can go into the settings of each one and update various settings as needed. Update the retention time for your video recordings, tweak motion detection settings, update the resolution you’d want the camera to record at and many more. The options available will be dependent on the camera brand and model so you may or may not have all the options available to you.
Surveillance Station Performance
Apart from a few minor pain points, Surveillance Station’s performance has been top notch. We have been using Surveillance station for well over an year, and it has never failed on us apart from a camera requiring a reboot occasionally which isn’t a fault of the application itself.
Since Surveillance Station does not consume a whole lot of system resources, you can utilize older Synology NAS devices to run it. We ran Surveillance Station on both a DS220j which is an entry level device and a DS220+ which is an entry level performance NAS. Surveillance Station worked effortlessly on both of these devices running 2 cameras with continuous recording enabled.
Granted the more cameras you’d install, the more grunt you will need, however to give an example, with 2 cameras running on a DS220J the CPU usage was hovering around 4% with memory utilization under 50% which is quite negligible.
Remote Access
You can view your live feeds remotely provided you have enabled QuickConnect for remote access capability. We found that logging into the application remotely via the QuickConnect ID to be not as quick as you’d expect. You wouldn’t want to wait 20 odd seconds to be able to view a live feed once an alert is received, hence we’d recommend you either setup a VPN for local access to your network or setup Dynamic DNS.
Live View and Timeline View
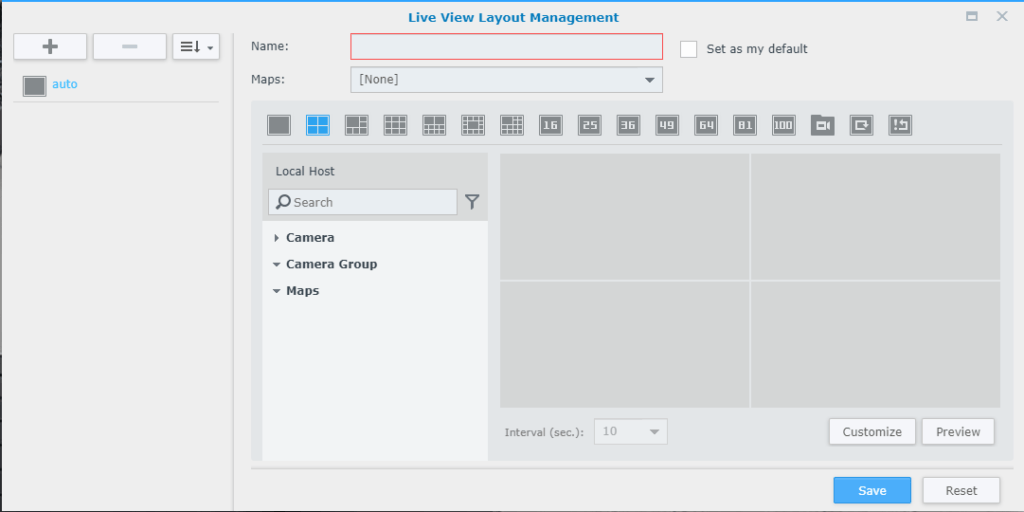
The Live View application allows you to view life feeds from all your cameras, and you have desktop, web and mobile utilities of this application making it quite a versatile application. Depending on the number of cameras, you can change the default view as needed, simply by clicking on the pre-defined windows, or customize a view as you desire.
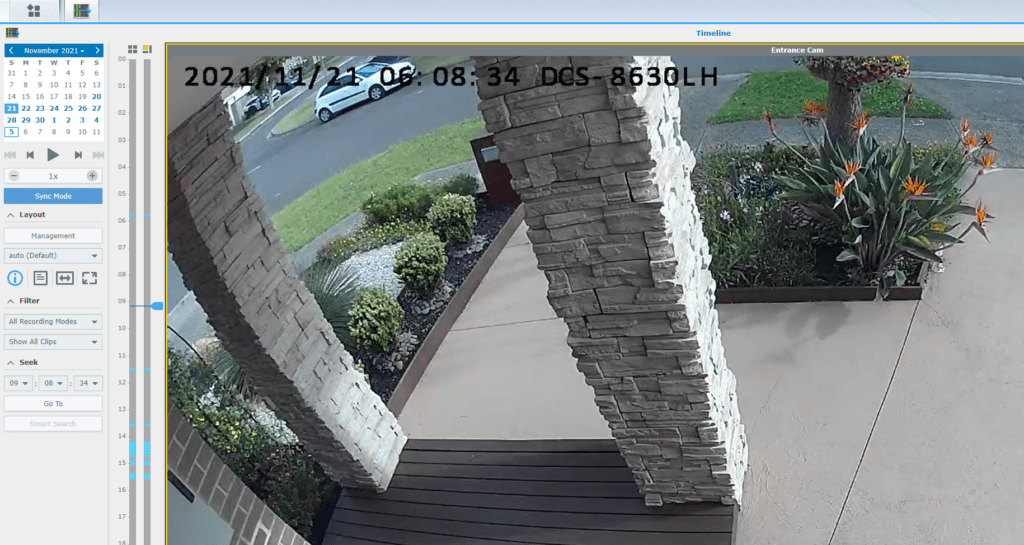
The Timeline View allows you to go back in time to view recordings the Surveillance Station has captured for each camera. You can go back as far as the retention period you setout in the camera settings. Viewing past recordings were extremely smooth and you can easily pick a date/time should you wish to check a particular incident. The application was surprisingly very intuitive and user friendly.
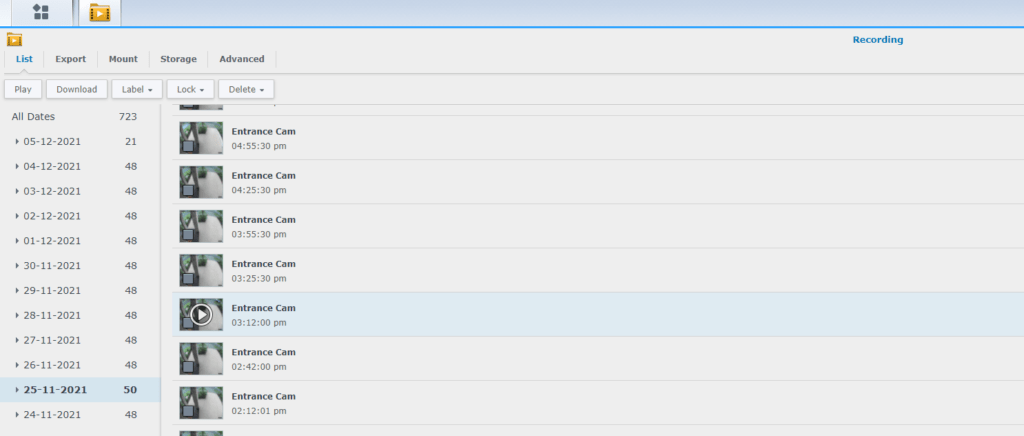
The Recording app shows all recordings for each camera connected to Surveillance Station. Here you have the option to export recordings to a backup source if required and do other minor maintenance tasks.
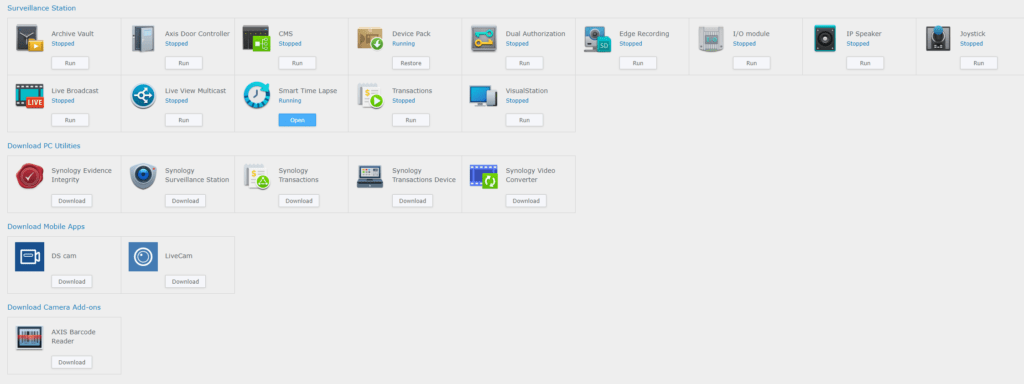
While these are the basic applications most users would require, Synology provides an extensive range of applications within the Surveillance Station application that caters to specific scenarios as we mentioned at the start of this review.
Conclusion
So the question now remains, do you go with a dedicated NVR setup or should you purchase a Synology NAS and benefit from the vast array of features it offers among its NVR capabilities. Well this really would depend on personal requirements as well as the number of cameras you would be installing.
For example, if you were to install 8 or more cameras, that’s approximately AU$474 you’d need to fork out for camera licenses on top of the cameras themselves. However the factor to keep in mind is that a Synology NAS provides much more features and functionality than being a standalone NVR device and it’s brand agnostic. So if you wanted to future proof your CCTV setup and not be tied down to a single brand Synology Surveillance station is the way to go.
Overall there’s hardly anything that you can fault on the Synology Surveillance Station and given it’s a seasoned product with over a decade of development, it’s certainly a very mature product. If you want to learn more about Synology Surveillance Station, Synology is having a webinar on the 8th of December 2021 which you would certainly benefit from.
- Register now: https://sy.to/z9pcx
- Learn more: https://sy.to/gtvfj
Synology Surveillance Station - low cost CCTV setup
Free