
Migrating from Google Workspace to Synology MailPlus
If you’re like the many thousands affected by Google’s recent announcement of stopping their G Suite legacy free edition and requiring users to start paying, then read on to find out an easy way to start migrating your data across to your own mail server solution hosted on Synology MailPlus.
Personally it’s a bit of a rotten move by Google to make this announcement and you can’t help but feel like it’s a classic snatch and bait scenario. Nevertheless this announcement made us want to completely move away from being reliant on Google services and what better way to do this with a fully integrated solution from Synology. For Google Drive, you got your Synology NAS (Network Attached Storage) and for Photos you got Synology Photos (Read our migration review here).
What options are there for email?
Well there are quite a few free cloud solutions out there if you were still keen on migrating to another cloud provider. Zoho for example have a free solution that has a 5GB limit per user account. However if you wanted complete control and no longer have to rely on any limitations, Synology have a out of the box enterprise solution called “Synology MailPlus”.
Before you migrate email across however, there are a few things to consider depending on how you have been using your G Suite email.
Pre-requisites
- Static IP address so you can update the mail server details for your domain.
- Required MailPlus licenses for the number of users
We’re not going to go through the DNS changes you’d need to make for your domain or how to setup port forwarding on your router to the mail server on this article as these are out of scope. You can certainly leave a comment if you require additional help on these aspects.
Google Workspace migration steps
Step 1: Formatting email for migration
We found that some mail servers weren’t able to identify labels setup in Google. As a result, any emails with labels are duplicated into folder names, thus duplicating most items on your inbox.
Example: If you had a label on your Google email account called “Finance”, when migrating across, a folder would be created on the new mail server with the name “Finance” and essentially you’ll have the same copy of the email in 2 locations. This is simply a waste of storage
Just like GMail, most emails that come through to your Inbox get labeled as important. As a result we found that most of our emails were getting duplicated on the Inbox folder and “Important” folder when migrated onto the new mail server.
So for step 1, we wanted to remove all labels with the label tag “Important”. Your scenario could be different but you would be able to modify the steps below as needed.
Create a new filter on your Google mail account
- Has the words “is:important”
- Doesn’t have “qwertyuioppoiuytreewq%%%%” (Idea here is to find a text that doesn’t exist)
- Date withing: Ideally go back 1yr

Click on “Create Filter”
You’d be shown the below message. Click “OK”
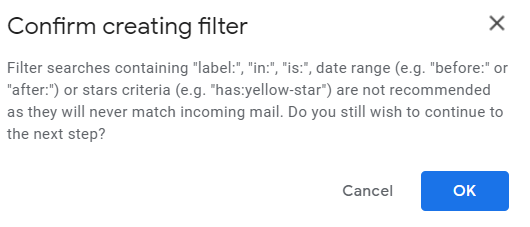
On the next page, select “Never mark it as important”

Click on “Create Filter”
Now you’ll notice that all emails with the label “important” will no longer have that label. You can repeat the process for any other labels as well.
Step 2: Clean up unwanted email
You may want to do some spring cleaning such as deleting emails with large attachments that are no longer needed, or emails older than a specific date range which you believe aren’t required.
This step isn’t required, however is a good step to do if you wanted to keep your email uncluttered.
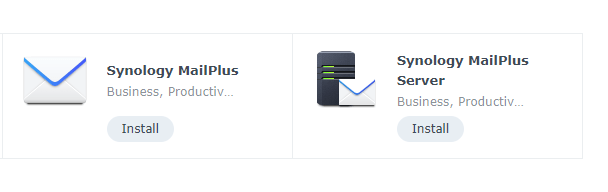
Step 3: Install Synology MailPlus
Go to the Synology package center and install both the “Synology MailPlus” and “Synology MailPlus Server” and wait for the process to finish.
Step 4: Configure Synology MailPlus Server
Once you open up Synology MailPlus Server, you’d get the following options.

Select “Create a new mail system” and click next.
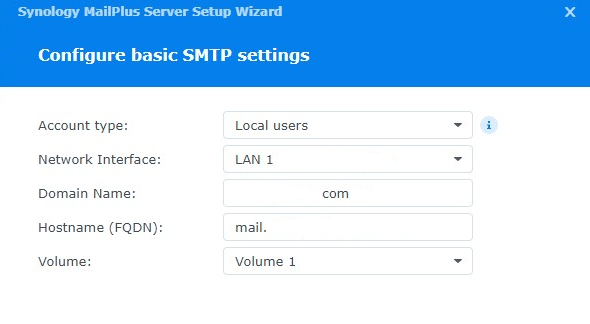
Enter the relevant details on next screen. The FQDN should be the same from your domain’s DNS settings. If you have multiple volumes, you can select the volume the mail data should be stored on.

On the next screen the application will go about configuring the mail server with the settings provided.
Synology MailPlus Server
Once the server is installed, you’d be see the following admin dashboard. The details offered are pretty self explanatory and you don’t require much technical knowledge to configure settings here.
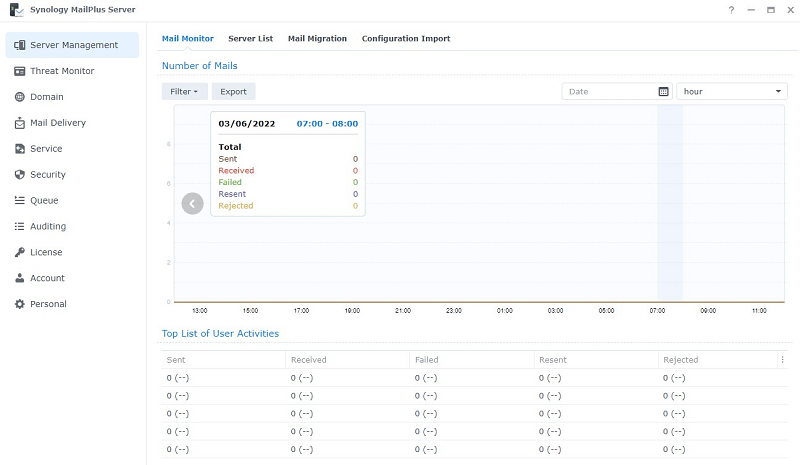
Before we do anything further, we now need to migrate all our email and contacts from Google Workspace. So lets move onto the next step.
Step 5: Authorize access from Google Workspace to Synology MailPlus Server
This is probably the most time consuming part on the whole migration process and depending on the size of each email box and the number of users, this process could take a couple of hours.
Before you can migrate email from Google, you need to setup authorization so that Synology MailPlus Server can talk to Google services. The article below from Synology does a good job of explaining this step, hence we’re not going to repeat this section.
Make sure you have followed the above article to the dot or the next step won’t work.
Step 6: Create user account(s)
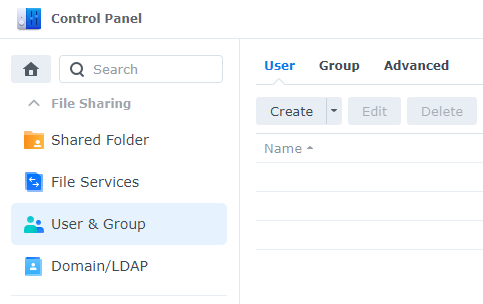
Now you need to create user accounts that would match the users on your Google Workspace. Simply go into Control Panel and create the relevant users and corresponding email accounts.
Next, you need to go to Synology MailPlus Server control panel and select the accounts you wish to activate.
Important:
Make sure to tick the “Activate” checkbox under the user account and click “apply”. If you don’t do this you’ll get an error when trying to open Synology MailPlus client via the respective user login.
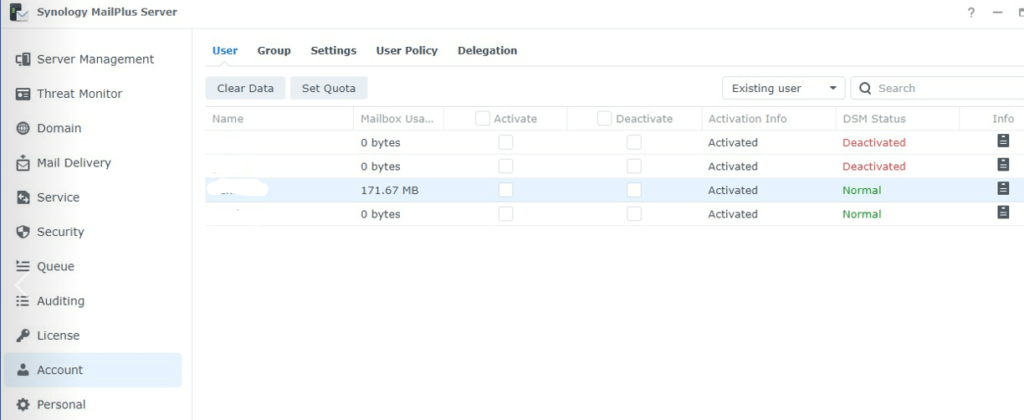
Note that Synology MailPlus server offers 5 free licenses by default. If you needed more licenses these can be purchased separately and added on by going to the “License” section.
Step 7: Migrate email from Google Workspace to Synology MailPlus Server
On this step, you’d need the file you saved from Step 5 above.
Go to “Server Management” and click on “Mail Migration” tab.
Create a new task:


- For task name, simply enter any name you want. e.g. “MailPlus Migration”
- Select the server type as “Google Workspace” from the drop down.
- Google Workspace service key: Click on the browse icon and point to the file you downloaded in step 5
- Accounts to migrate per time period: Ideally you want to keep this under 5 depending on how big each account is.
- You can also schedule the migration task if you didn’t want it to happen immediately.
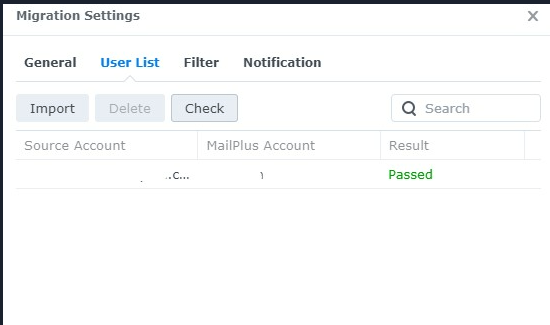
Next click on “User List” tab.
Here you need to upload a CSV file containing all the user accounts to be migrated. The format should be as follows:
[Google Workspace email account],,[Synology MailPlus User account]
Note that the two “,,” above is not a mistake.
Once you have imported the user accounts, click on the “Check” button to ensure it passes validation. If you get a “Passed” result, you’re good to proceed.
- Now you’re ready to Start the migration task.
- Simply click on “Start” button and the task will commence.

You can view the log event viewer to see how the task is progressing. The Error log you see in the picture is when we incorrectly imported the CSV user list.

At this point, you can login to one of the user accounts to see if emails are showing up. You’d notice that all labels gets migrated over first and Sent items after.
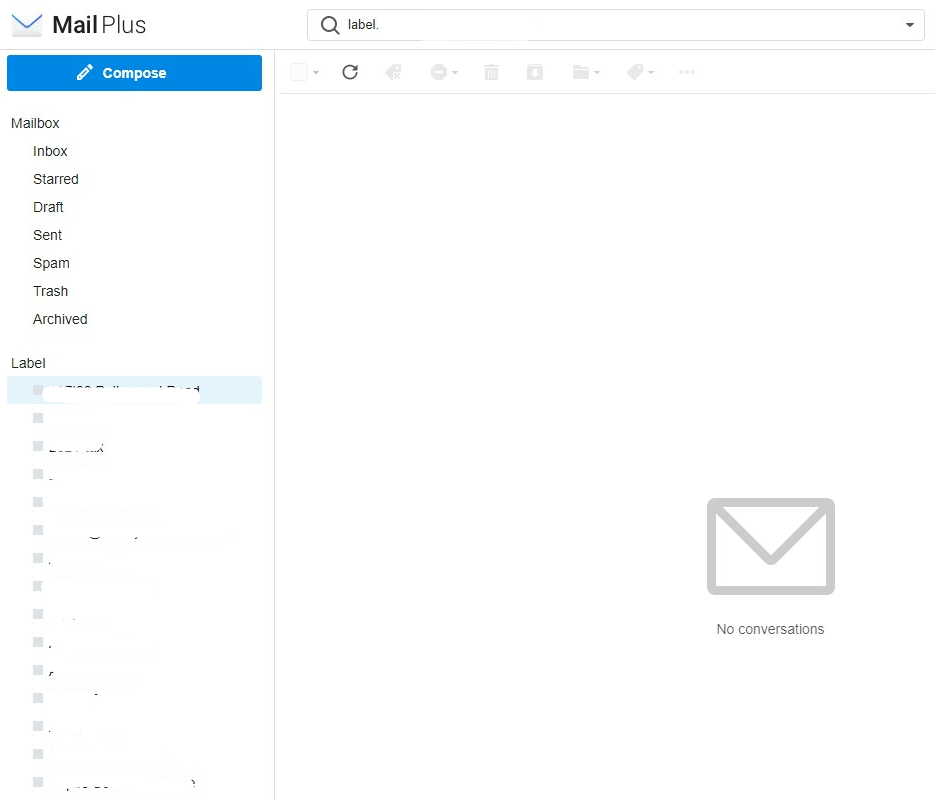
Emails seem to get loaded in batches and what we like about Synology MailPlus is that it’s capable to recognize the Google Workspace labels accurately. Some mail services like Zoho creates separate folders for labels created on Google Workspace which isn’t ideal.

When the task completes, you’re done with your migration. Congratulations !!!! You now deserve a good beer.
Additional features you can enable on Synology MailPlus Server
- Anti-virus
You can enable ClamAV which is a lightweight antivirus solution for your email server so it’ll scan all incoming/outgoing email. Enabling this is recommended, however note that it’ll have an impact on system resources.
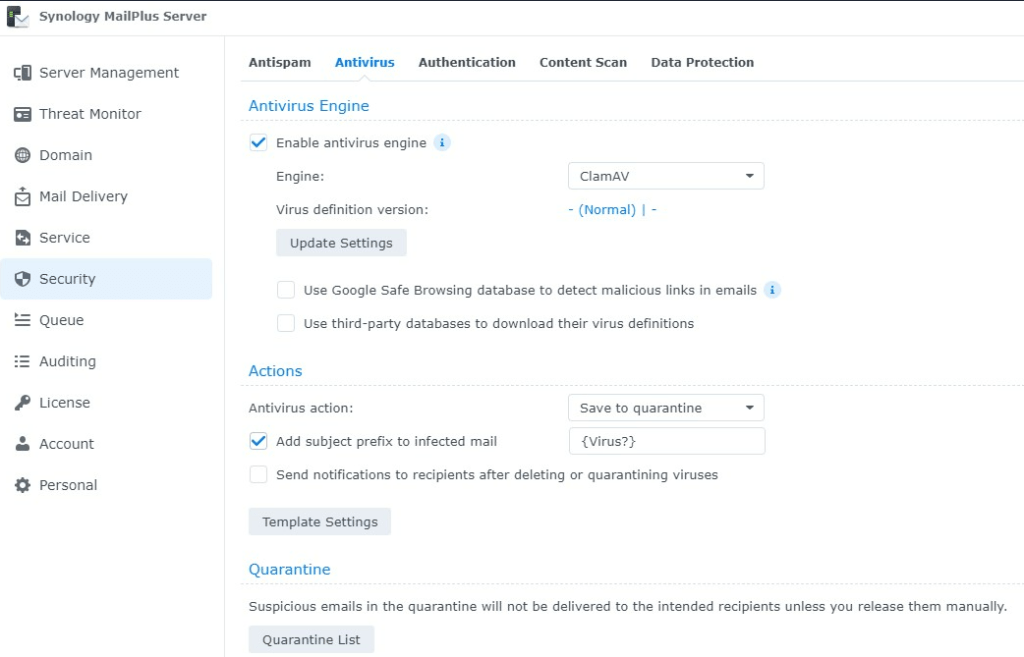
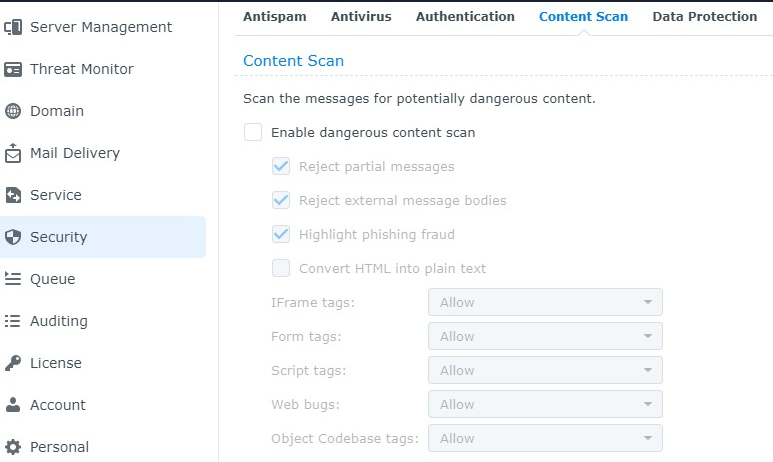
You can also do content scanning if you wanted to go a step further.
- Spam Protection
There’s also a spam protection engine and you can also add custom spam filters if you desire.

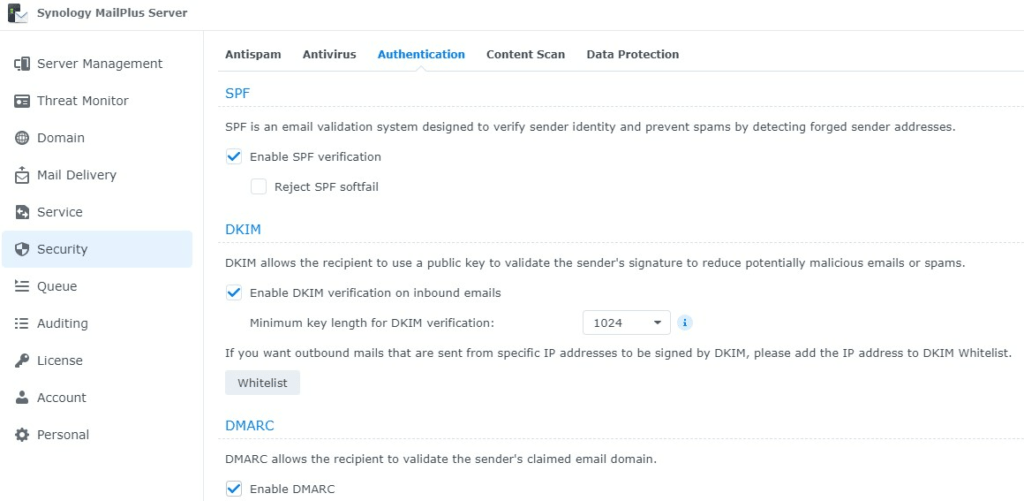
- Authentication mechanisms
Synology MailPlus Server supports SPF, DKIM and DMARC which are recommended to be enabled if you want to ensure best protection from spam, email spoofing and phishing attacks. You need to make certain DNS changes before enabling these, so make sure to read up online before enabling these features.
Synology MailPlus Client
We found the Synology MailPlus client to be quite light weight and very responsive. It almost resembles the look and feel of Gmail, so you won’t have a hard time adjusting to it.
Your system resources are going to take some hit after enabling the email server, so be aware of this when you enable additional services. Ideally you may want to increase your NAS memory as this is what will take the biggest impact when you enable AntiVirus scanning.
Nevertheless, we have been using Synology MailPlus for a few weeks now and I must say it has worked flawlessly. And the best part is, you are in complete control of your data and know that no cloud provider is scanning your email content. You no longer have to worry about new policies coming in and increasing your expenditure as the NAS is owned by you and the email licenses are for lifetime.
However few things you need to keep in mind.
- Ensure you got a solid backup strategy in case of data loss.
- Make sure you have a static IP and not running your email server on a DDNS setup. You’re bound to get your email server blacklisted
- Invest on a UPS in case of power failure
Comment below if you run into any issues or have any questions, and hope this article helped you and not feel trapped by Google’s nasty decision. For further details on Synology MailPlus head on to https://event.synology.com/en-au/MailPlusforSMEs