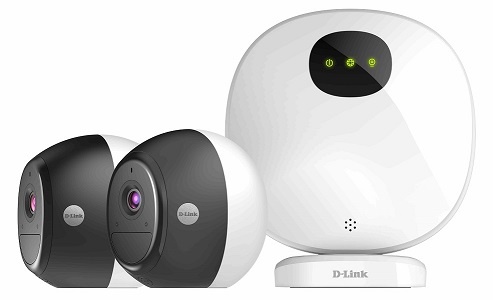
OMNA DCS-2802KT Wire Free Security Camera Kit
Setting up mydlink Application
The mydlink application is your central point of controlling the cameras and the hub. It’s downloadable on both Android and IOS. The application allows you to control the sensitivity of the motion sensors for each camera, setup automation actions, one tap activation and setup scheduling.
The app works on IFTTT (If this, then that) and it may appear slightly confusing at first, but once you know the workflow it’s quite easy to automate arming cameras etc through the one tap feature.
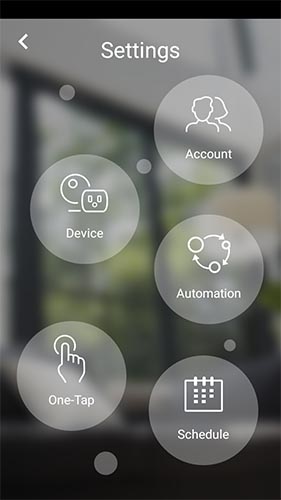
Going into the “Device” section gives you access to managing the Hub and cameras, including choosing between local and cloud storage. The OMNA DCS-2802KT is offered with a free 12 month subscription to dlink’s premium cloud service where it’ll store your data for 14 days. At the end of 12 months if you don’t want to continue by paying the premium service, there’s a free service which saves your data for a day.
The settings available in this section is pretty self explanatory and we don’t see anyone having any trouble working things out.
We would like to however go through a quick setup of the “Automation” and “One-Tap” feature. We will walk through a typical scenario of arming your cameras when leaving the premises.
Step 1 – Setting up Automation task
You first need to setup a automation rule which you would then attach to one of the “one-tap” features.
Go into “Automation” under settings and you’d be offered a screen as below.
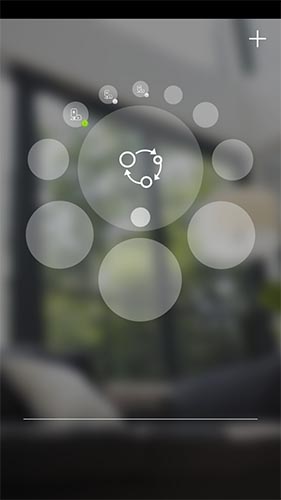
Click on the “+” symbol which will bring up the screen you see. (Note that screen is showing “Automation 3” as we have already setup rules previously).
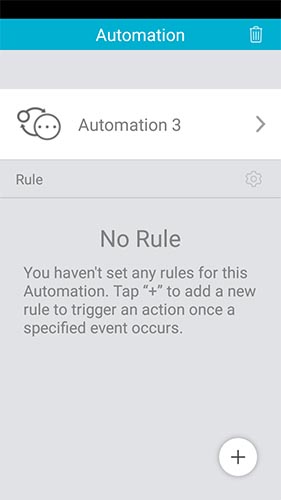
Next, click on the “+” symbol under the “Rule” section which will show the following screen.
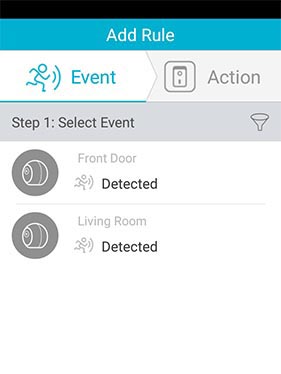
Note that we have already named our two cameras “Front Door” and “Living Room” which is why you see them as above. If you haven’t already named your cameras (Available under settings->device) you’ll simply see the model number of each camera. Since the model names will be identical, our advice is to rename the cameras first to make this part easier.
Getting back to the rule, what we want is for the cameras to perform a certain action if it detects movement while you’re away from home. Hence you would tap both cameras to select the actions as below.
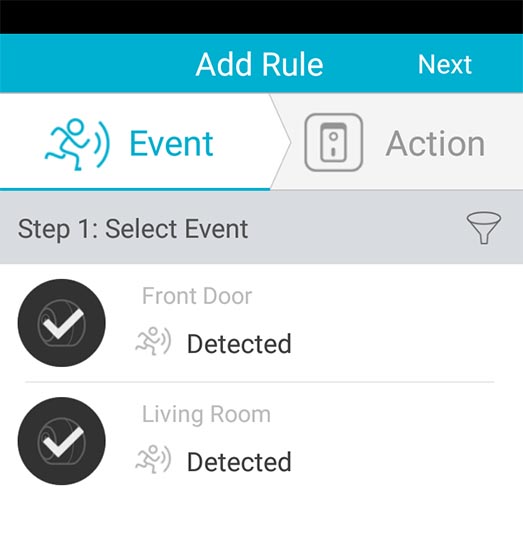
Next click on “Next” icon on top. The following screen will give you options for what you want the cameras to do when they do detect movement.
In this case, I have selected “Recording” for both cameras and “Push Notification”. Recording will ensure that the cameras will start recording soon as movement is detected and the Push Notification will send you an alert on your mobile.
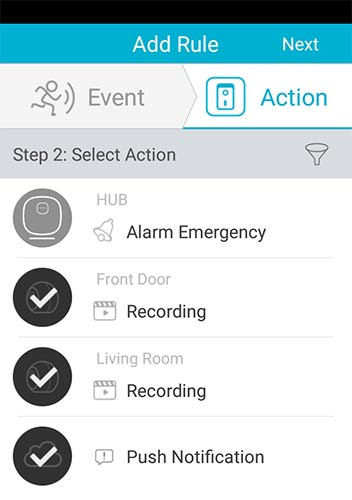
Click “Next” and it’ll show a summary of the automation task you have chosen in the previous steps and give you the option to “Save” or go back to make any changes.
Completing the “Automation” activity still does not mean that the cameras will now start recording soon as it detects movement. This is where the “One-Tap” feature comes into play.
Step 2 – Setting up One-Tap task
Click on the “One-Tap” icon under settings and it’ll bring up the below screen. Unlike in step 1, for One-Tap tasks there’s already pre-defined statuses and you cannot create new ones. You’d have to edit one of the given statuses which is still adequate.
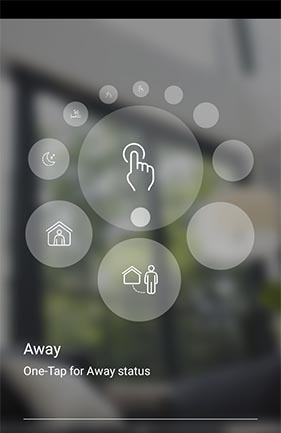
We’re choosing the “Away” status to modify in this instance as the One-Tap action we want to setup is when we’re leaving home. (Note: You’re seeing “My Tap” as the heading since we have already setup the “Away” task and wanted a blank template to demonstrate)
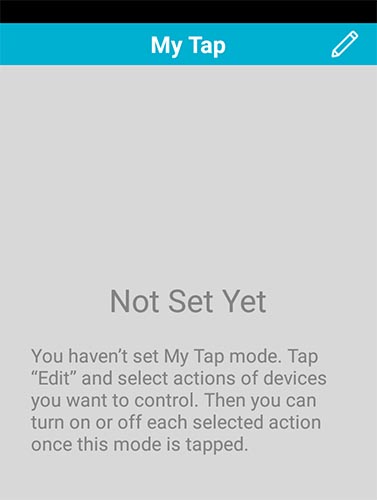
Click on the “pencil” icon to start editing this status and you’ll be offered the below screen. The “Automation” task we created in step 1 above will be shown in the “Automation” section of this screen.
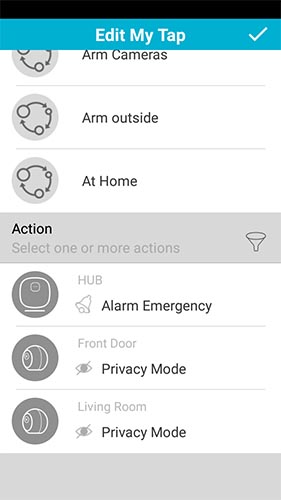
The automation task we named for arming all cameras was “Arm Cameras”. (You could name it whatever you want, just make sure to choose the correct one here).
So the thinking here should be, If “Arm Cameras” task is selected, then what other actions should the cameras perform. “Privacy mode” means the cameras will be disabled from recording and be non functional until you turn off their privacy status. This is ideal if you got a camera setup indoors and you don’t want it recording while you’re around.
Imagine that in another “One-Tap” task, you have enabled privacy mode to be “on” then you need to explicitly bring them out of the privacy mode when setting up your “Away” status. If not both your cameras will be non functional when you select “Away” one tap status.
So here’s what you need to do.
Select “Arm Cameras” automation task, select “Privacy mode” for both cameras and press the top right marker to move to the next screen.
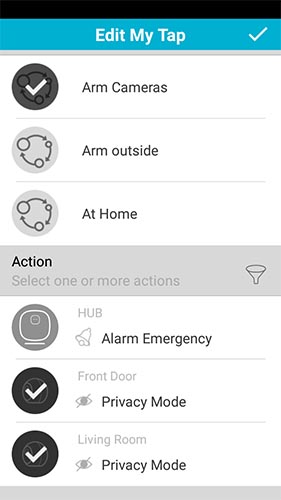
The next screen now gives a summary of the actions that need to be performed. If you’re not careful here you would be performing the wrong actions.
What we want when we select the “Away” one tap status is for it to arm all cameras for recording when movement is detected, and bring the cameras out of privacy mode if the privacy status was enabled before.
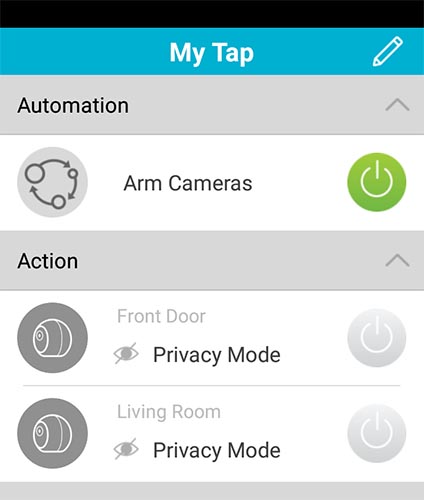
As the above screen loads, all “Power” icon buttons on the right would be grey, meaning disabled. Since we want the “Arm Cameras” automation task to be enabled, we tap the power icon for arming the cameras.
We make sure the “Privacy Mode” action for both cameras remain disabled. This means if the privacy mode was enabled previously, it’ll get disabled and make the cameras functional.
And that’s all there is to it. To “Save”, you simply move out of the screen and it’ll save those settings. While this process may look slightly involved, once you test it out a few times you’ll get the hang of it. I guess it goes without saying but make sure you test out the settings once completed.
Timeline View
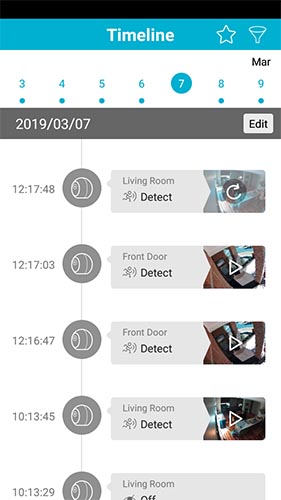
We like the timeline view offered by the app, which gives a log history of all movement detected by each camera. Simply press the “Play” button on each clip to view the recording. You have the option to download the videos to your phone as well.
| Table of Contents |
| 1. Introduction |
| 2. OMNA DCS-2802KT Package |
| 3. Installing the DCS-2802KT Camera kit |
| 4. OMNA DCS-2802KT Performance |
| 5. Setting up mydlink Application |
| 6. Improvements & Conclusion |
