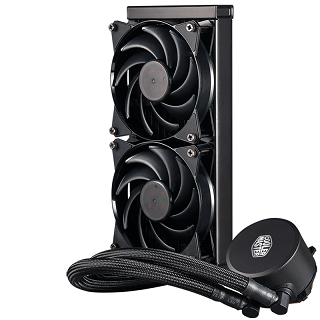
Coolermaster Masterliquid 240 AIO Liquid Cooler Review
Installation and Performance
Installing the MasterLiquid 240 is incredibly straight forward. The universal back plate included caters to almost all Intel and AMD CPUs including the new AM4 based mounts. This support comes straight out of the box so no additional requirements to purchase a mounting kit.
Few Considerations
It’s recommended to connect the 4pin fan splitter to a PWM capable fan header so that you won’t have these fans running at 100% continuously. It’s certainly a waste of resources and you can benefit from overall lesser noise levels. The 4 pin connector for the pump should ideally go into a non PWM fan header so that liquid continuously flows through the system at 100% capacity. The FEP tubing is long enough to even accommodate high tower casings, so you can experiment with the best position for the radiator unit. Installing the MasterLiquid 240 was undoubtedly a breeze and the only thing remotely tedious was securing the back plate. Kudos to CoolerMaster for going the extra mile to ensure trouble free installation for their MasterLiquid series.
Performance
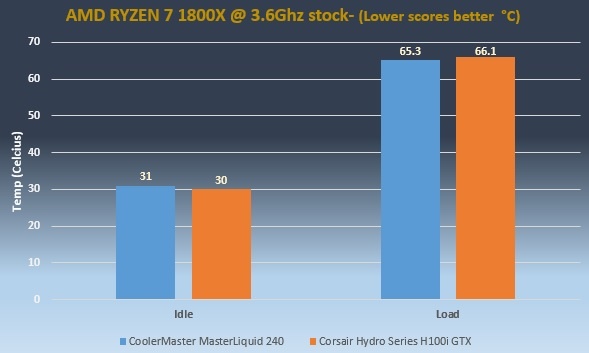
First we put the MasterLiquid 240 against the mighty AMD RYZEN 7 1800X. Our standard cooler testing process includes using Prime95 and running its torture test for 15mins thrice and averaging the results.
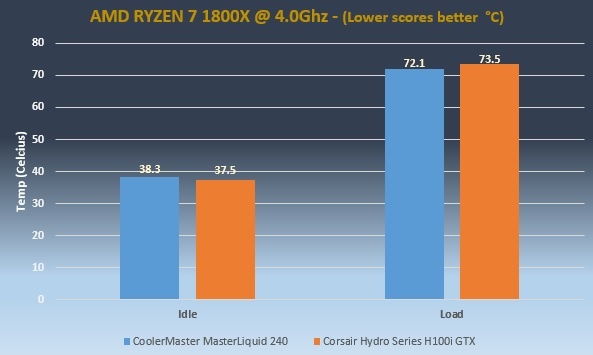
This time we also performed a few extra tests using 3D Mark’s testing suite.
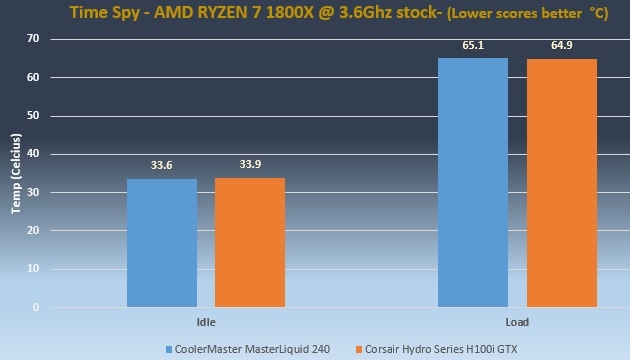
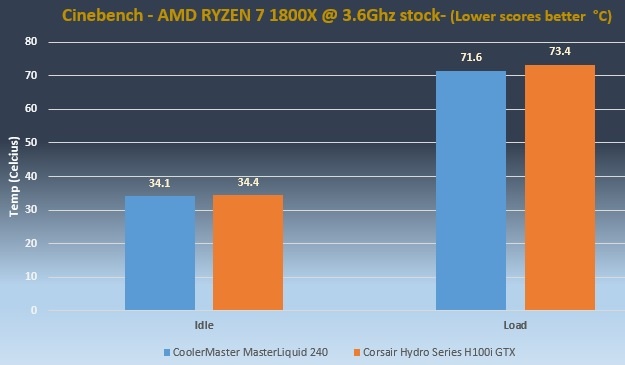
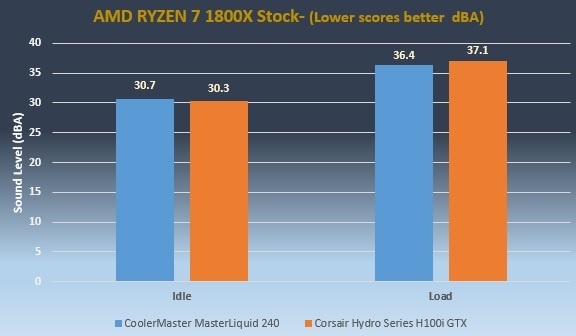
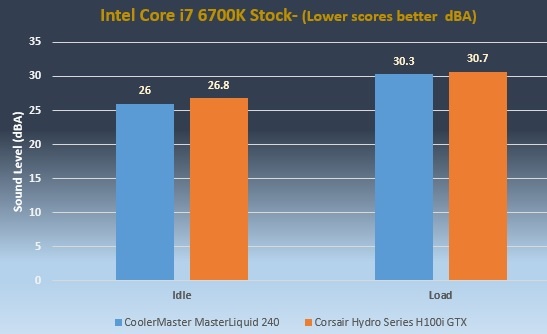
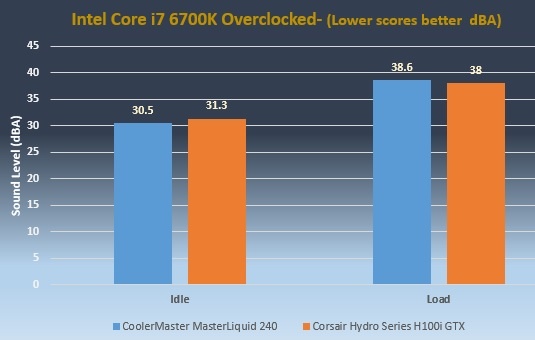
Make no mistake, these levels of noise inside a casing you’re not even going to hear anything apart from a very faint fan sound. All our sound tests were done with both fans on PWM control. These levels will be quite higher if you have them running full speed all the time.
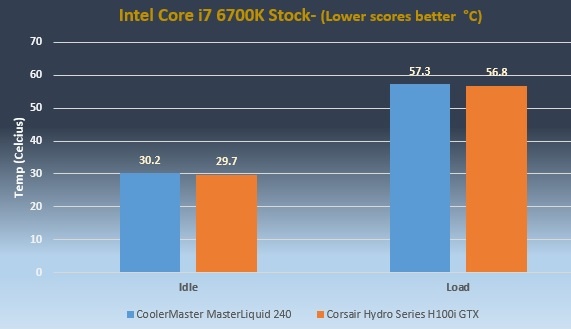
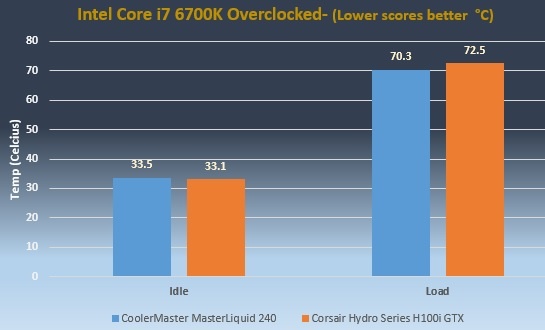
Next we test the MasterLiquid 240 against Intel’s Core i7 6700K.
